


Choosing the right Led Power Supply begins with matching its output to the lighting load. Check the LED fixture or strip label for voltage and current requirements. A 12-volt system needs a compatible 12-volt supply; choosing a higher voltage can damage the LEDs. The supply’s rated current must meet or exceed the load’s needs. For example, calculate the total wattage of every connected strip, then compare it with the manufacturer’s guidance. It is tempting to treat wattage as the whole answer. It isn’t.
Next, consider how the lights will be used. Constant-voltage and constant-current products serve different LED designs, so confirm the required type in the product documentation. If you need dimming, verify that the supply and dimmer use compatible methods. Check the enclosure rating for the installation location, especially where dust or moisture may be present. Also consider ventilation: a supply tucked into a small cabinet may run hotter than one in an open space. Small details matter.
A reliable choice comes from checking specifications, not guessing from appearance. Review the manufacturer’s datasheet, installation instructions, and applicable safety marks for your market. Leave suitable capacity according to the manufacturer’s recommendations, but avoid buying a much larger unit without a reason. Connector fit, cable length, and expected operating temperature deserve attention too. Not always obvious. This guide explains how to compare these factors and avoid common mismatches. If a label is unclear, pause and ask the supplier or a qualified electrician; uncertainty is worth resolving before installation.
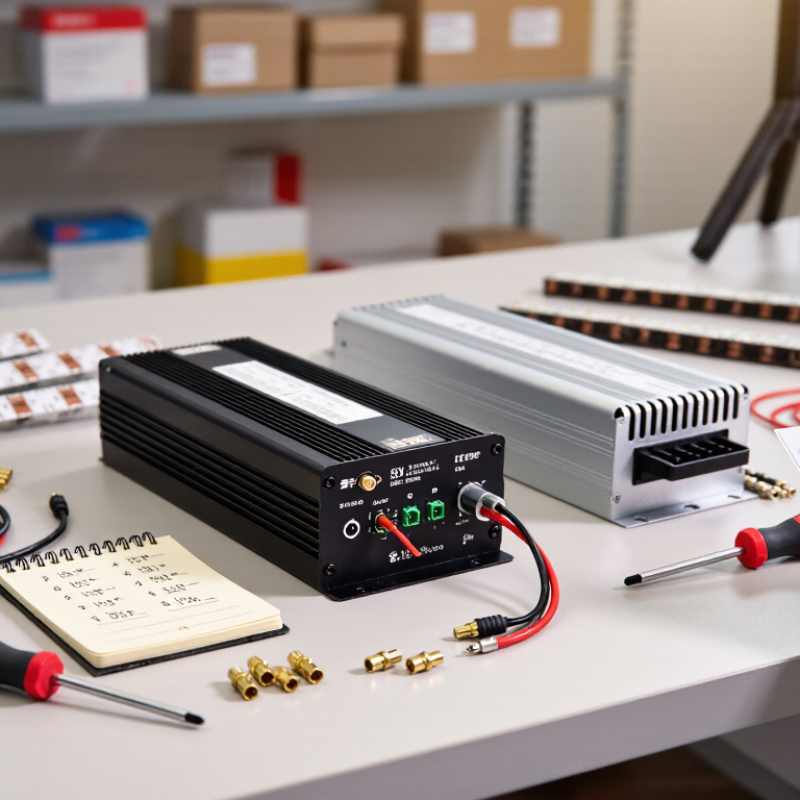
Before choosing a power supply, identify exactly what the LED load requires. Check whether it uses constant voltage or constant current; these are not interchangeable. LED strips commonly specify a fixed voltage, while some individual LEDs and modules require a controlled current. Read the product datasheet, not just the label on one component. Small details matter. Note the required output voltage or current, the load’s total wattage, and any acceptable operating range.
For a strip, multiply its rated power per metre by the installed length. A five-metre strip rated at 10 watts per metre needs about 50 watts, before allowing for operating conditions. Check the supply’s continuous rating and any temperature-related derating; a supply may deliver less power in a hot, enclosed space. Do not guess.
Also confirm dimming compatibility, connector polarity, and whether the installation is indoors or exposed to moisture. A paper calculation is useful, but it cannot reveal every issue: long cable runs can cause voltage drop, and real installation conditions are easy to underestimate. Measure the load where practical, then compare the readings with the manufacturer’s specifications.
Check the LED’s rated voltage before comparing power supplies. A 12-volt LED strip needs a 12-volt supply, not a 24-volt model. Higher voltage can overheat LEDs, damage components, or shorten their working life. Small mismatch, big trouble.
Also identify the LED load type. Many flexible strips use constant voltage, while some LED modules require constant current. For a constant-current light, match the driver’s current rating and confirm its voltage range includes the LED’s operating voltage. The label alone may not tell the whole story. Check the product specifications.
A common workshop mistake is matching voltage but overlooking the wiring run. Long, thin cables can cause voltage drop, making LEDs dimmer at the far end. Measure the cable distance, follow the manufacturer’s wiring guidance, and check voltage near the load when possible. For a constant-voltage system, choose a supply with enough current capacity for the total load, plus a modest reserve if the manufacturer recommends one. Do not assume extra capacity raises the output voltage. It should not. Recheck the figures; real installations can be less tidy than a worksheet.
Choose an LED power supply by calculating the load it will actually serve. Add the wattage of every fixture or strip section. For LED strips, multiply watts per meter by the installed length. A 5-meter strip rated at 9.6 watts per meter needs 48 watts. Check the strip’s required output voltage too; the supply voltage must match. A correct wattage with the wrong voltage will not work safely.
Leave headroom rather than running the supply at its maximum rating. A practical starting point is 20–30% above the calculated load, though product instructions and operating conditions should guide the final choice. For a 48-watt load, 60 watts provides 25% headroom. Heat can reduce performance, especially in a tight enclosure or warm location. Check the supply’s continuous output rating and allow for dimmers or other connected equipment. The extra margin is useful, but it is not a substitute for checking specifications.
Tips: Measure the installed length, then verify the wattage per meter on the product label. Keep connections accessible and avoid enclosing a supply without adequate ventilation. If the figures seem inconsistent, pause and recheck them; it is an easy detail to overlook.
Choosing a driver begins with the LED load, not the dimmer. Constant-current fixtures need a driver matched to their specified current and voltage range; 12- or 24-volt LED strips usually need a constant-voltage supply. Then check the control method. Phase-cut, 0–10 V, DALI, and PWM are not interchangeable. Compatibility matters.
The U.S. Department of Energy’s 2017 energy-savings forecast estimated that LED adoption could save 348 terawatt-hours annually by 2027. That projection covers LEDs broadly, not dimming alone, but it shows why efficient system choices matter. Dimming can help reduce output when full brightness is unnecessary; actual savings depend on use, controls, and installation. Check the driver’s dimming range, minimum load, and rated output before buying. A label that says “dimmable” proves too little.
At a workbench, test the actual fixture, driver, and wall control together. Watch for flicker or a sudden jump in brightness near the lowest setting. Read the fixture data sheet, and confirm the driver supports its load across the intended range. One detail is easy to miss: a driver may dim smoothly at full load but behave poorly with fewer fixtures. I would verify that combination before installation.
| Driver Type or Feature | How It Works | Typical LED Application | Dimming Considerations | What to Check Before Selecting |
|---|---|---|---|---|
| Constant-voltage driver | Maintains a set output voltage, commonly 12 V or 24 V DC. The connected LED load draws current according to its design. | LED strips, signage, and other LED products designed for a fixed DC voltage. | May use PWM dimming or a compatible dimmable power supply. The dimmer must match the driver and LED load. | Match the supply voltage to the LED product. Confirm that the total load is within the supply’s rated wattage and current limits. |
| Constant-current driver | Regulates its output current while operating within a specified output-voltage range. | LED modules and fixtures specified by the manufacturer for a particular drive current. | Dimming may use 0–10 V, DALI, phase-cut, or another method, depending on the driver model. | Match the driver’s output current to the LED specification and ensure the LED’s forward-voltage range falls within the driver’s range. |
| Non-dimmable driver | Provides power at its rated output without a supported dimming control input. | Installations that operate at a fixed light level. | Do not assume that adding a wall dimmer will provide safe or reliable dimming. Use a dimmer only when the driver is rated for that method. | Check the product documentation for an explicit dimming specification before connecting any dimmer. |
| 0–10 V dimming | Uses a low-voltage control signal to adjust light output through a compatible driver. | Commercial or architectural lighting with a 0–10 V control system. | Confirm the control wiring, signal type, dimming range, and whether the control circuit sources or sinks current as specified by the equipment. | Verify that the driver and control device support the same 0–10 V control standard and wiring arrangement. |
| DALI dimming | Uses a digital lighting-control bus to send commands to compatible drivers. | Addressable lighting installations that need centralized control or scene setting. | Requires a DALI-compatible driver and a correctly configured DALI control system. | Check the required DALI version, system components, addressing needs, and installation requirements. |
| Phase-cut dimming | Adjusts power using a compatible leading-edge or trailing-edge dimmer and driver combination. | Lighting installations designed to work with wall-mounted phase-cut dimmers. | Compatibility can vary by dimmer, driver, and connected LED load. Low-load operation may cause flicker or a limited dimming range. | Check the driver’s stated dimmer compatibility, minimum load requirements, and specified dimming range. |
| PWM dimming | Controls perceived brightness by rapidly switching the LED load on and off. It is commonly used with compatible constant-voltage systems. | LED strips and other loads designed for pulse-width modulation control. | Use a PWM controller or driver compatible with the LED voltage and load. Switching frequency can affect visible flicker or camera recording. | Confirm voltage, current capacity, channel configuration, and PWM compatibility with the LED product. |
| Power rating and headroom | The rated output indicates the maximum electrical power the supply is designed to deliver under specified conditions. | All LED installations. | Dimming does not remove the need to size the supply correctly for the connected load. | Calculate the total LED load using the product specifications. Allow suitable headroom where recommended by the manufacturer, and account for temperature and installation conditions. |
Selection reminder: Check the LED product specifications, driver output ratings, dimming compatibility, environmental rating, and installation requirements. Actual compatibility and operating limits depend on the specific equipment.
An LED power supply may sit above a damp ceiling, beside a dusty workshop bench, or inside a sealed outdoor enclosure. Match its environmental rating to that exact location. IEC 60529 classifies ingress protection using two numerals: the first covers solid particles on a 0–6 scale, and the second covers water on a 0–9 scale. For example, IP65 is dust-tight and tested against water jets. IP67 covers temporary immersion under defined test conditions, but it does not guarantee suitability for every wet installation. Check the manufacturer’s installation instructions, too. A high rating can be unnecessary if the unit is mounted indoors.
Look for safety certification relevant to LED power supplies, such as UL 8750 or IEC 61347-2-13, and verify that the exact model appears in the certification record. The IEC 61347 series addresses safety requirements for lamp controlgear, including LED controlgear. A certificate for a similar model is not enough. Check operating temperature and humidity limits on the datasheet; heat trapped above a ceiling can shorten service life even when the enclosure rating fits. It is tempting to choose the highest IP number. That may add cost without solving the real risk. Recheck the wiring conditions and mounting position before deciding. These details are easy to miss.
USA / Americas
1507 Capital Ave, Suite 102
Plano, TX 75074
+1 (214) 838-7010
8:00am – 5:00pm (GMT-6)
Australia / Asia Pacific
503 Cross Keys Rd,
Cavan SA 5094
+61 8 7200 3909
9:00am – 5:00pm (ACDST)
© 2025 Green Frog Systems. | Privacy Policy | Terms & Conditions


